Frame, Body, Chrome, Etc.
Initial Repairs
The bike as received is black with silver areas, but here and there could be seen an earlier colour which was a light blue. Most of the bolts and bolt threads are painted, so it was clear this was not original paint - but no matter. My intent as offered previously, is to conserve the machine, and not restore it. Having said that, there were a few things that needed to be addressed before using the bike.
The wiring was a bit untidy around the battery and the wiring for the side car light appeared to be lamp cord, so I spent an hour or two cleaning that up.
The wiring in these bikes is not complicated, but does have a couple of oddities. Referring to the first image below, the 'Kontroller' block is a large Bakelite switch block residing on the underside of the left handlebar cover. The ignition key is built into this switch assembly, and it would not stay in the 'run' position. Luckily the previous owner had included a new switch assembly with the purchase which was appreciated. Most of the circuits on the bike are routed through this main switch - except for the rear brake light switch which is fed directly from the battery.


As it turned out, the new controller switch was defective and I had to spend some time debugging it. The problem was the spring contacts that make and break connections inside the switch were not making contact, so retensioning them, as well as cleaning the contacts to ensure good electrical connection seems to have fixed it.
I did add a fuse to the stop light circuit, and may try to change it around so that it is tied into the ignition key. Currently, if the brake light switch were to stick the rear brake light would stay on and kill the battery. The system is 6 volt - so not much capacity for additional lights or accessories. Turn signals would be nice, but given the amount of usage this will likely get, I don't currently plan to add them. A bright stop light might be more useful just from a safety perspective - there are some automotive 6 volt LED options available so I may explore that further.
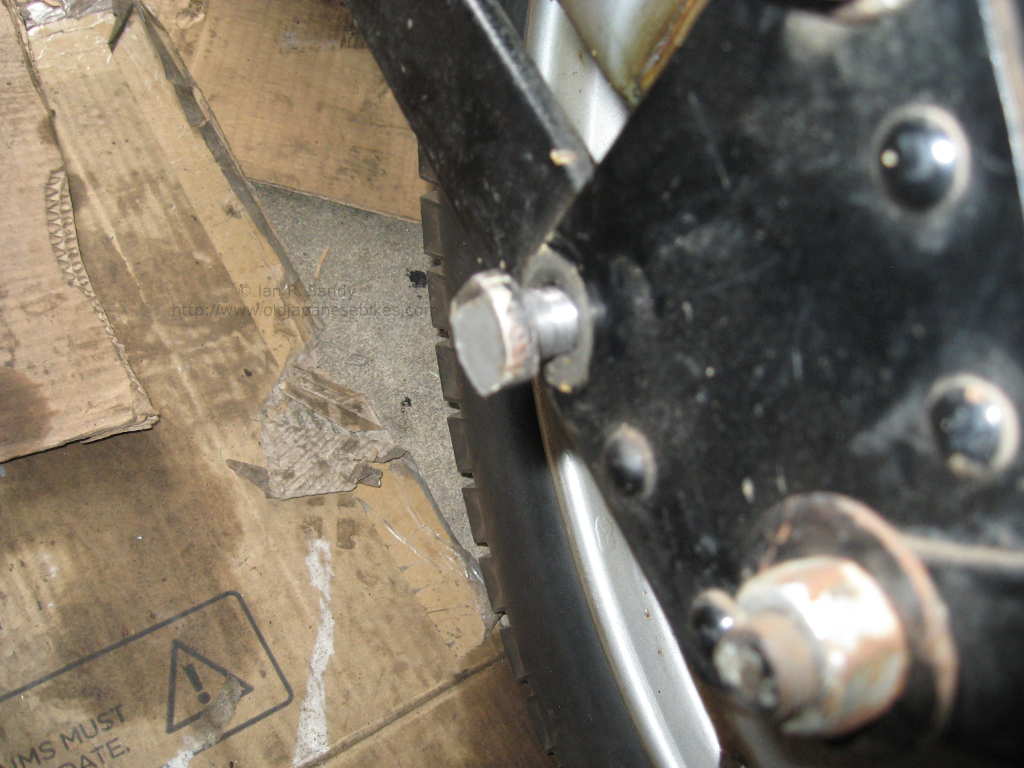
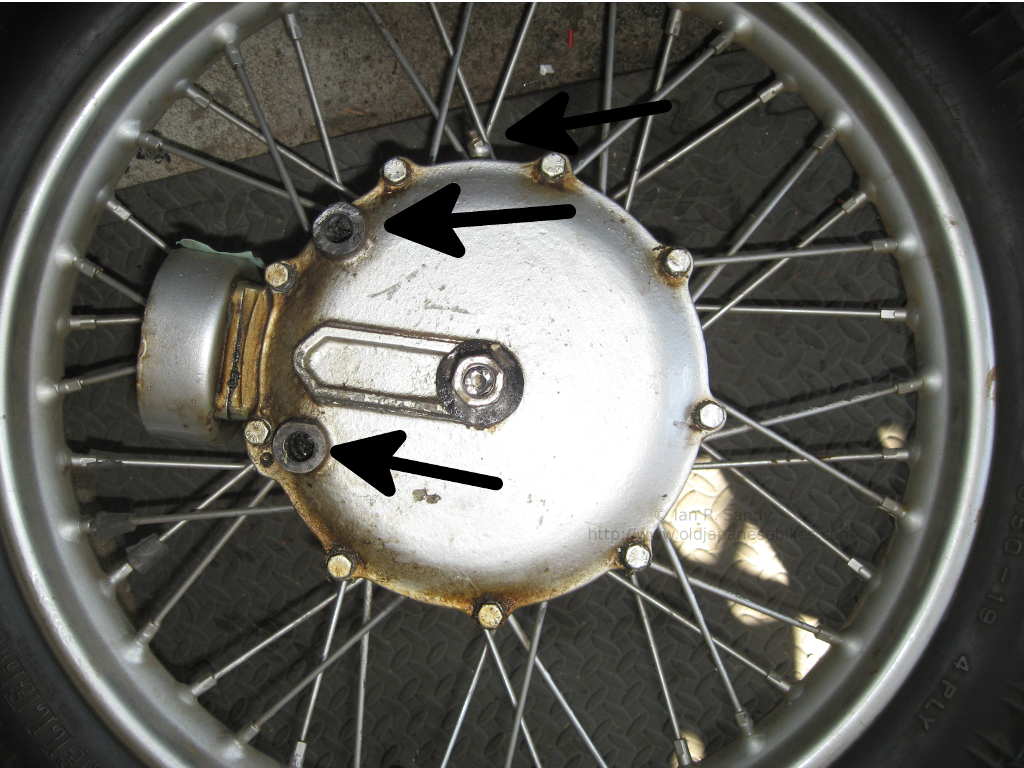
With the wiring tidied up and the ignition switch repaired, I moved on to the next item. I noticed that one of the securing bolts for the rear gear case seemed loose, and then when I pulled on it, it came away completely - totally stripped. I heli-coiled the two securing bolt holes - and to do this I had to remove the rear wheel completely, as while they initially looked to be blind holes, they actually weren't ! With the wheel off, I removed the gear cover plate, cleaned off the grease and tapped and helicoiled both bolt holes. It is interesting that for adding grease to the rear drive gears, you are told not to use the grease fitting at the top of the housing, but to remove one of these bolts and add grease through the bolt hole. The grease fitting at the top of the photo looks like a standard Suzuki swing arm fitting, so I will be checking to see if that might be a replacement option.
Next on the list was an oil change, and a check of the tappets - all seemed well, and so after that I took it for a short ride.
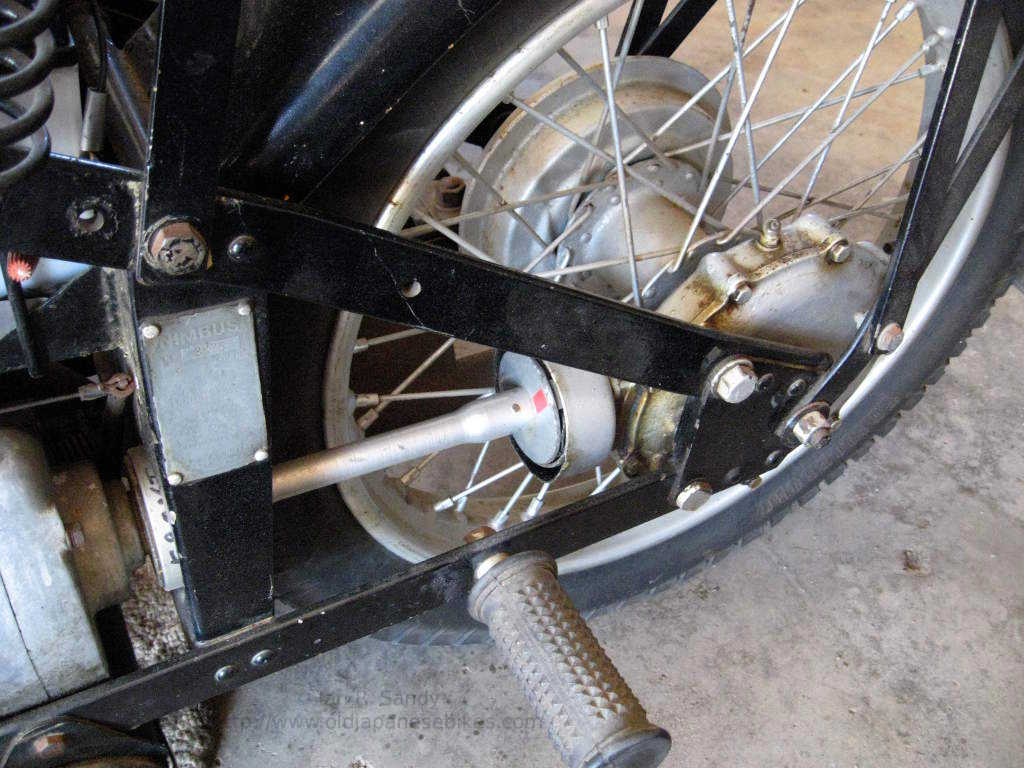
Frame
Of the many unique features of the Nimbus is the frame. It is made of riveted flat steel strips making it a sort of Victorian design I suppose. The frame can be prone to cracks around the rivets, but it must be acknowledged that this does not seem to be a common failure mode. Some photos are shown below:

Tools
The tool kit for the Nimbus is fairly basic and carried in a cylindrical tool box (indicated by the arrow in the photo below), which is normally mounted under the frame and behind the centre stand. The opening for the tool box is to the right side of the bike as otherwise the tool box lid will interfere with the kick start. On the military version, the tool kit is mounted behind the rear passenger pillion mount.
The tools included are:
- a set of feeler gauges
- a pair of pliers
- a flat blade screw driver
- a spark plug box wrench
- a 10 and 14 mm double ended box wrench
- a torque bar for the box wrench
- a 10 and 14 open ended wrench
- a 17 and 19 mm open ended wrench
- tire levers

Colour
With any machine like this, you wonder whether the paint is either original or even slightly resembles how it looked originally. In this instance, with the help of Lars Persson in Denmark, I was lucky in being able to positively identify the model of machine and therefore its original paint scheme.
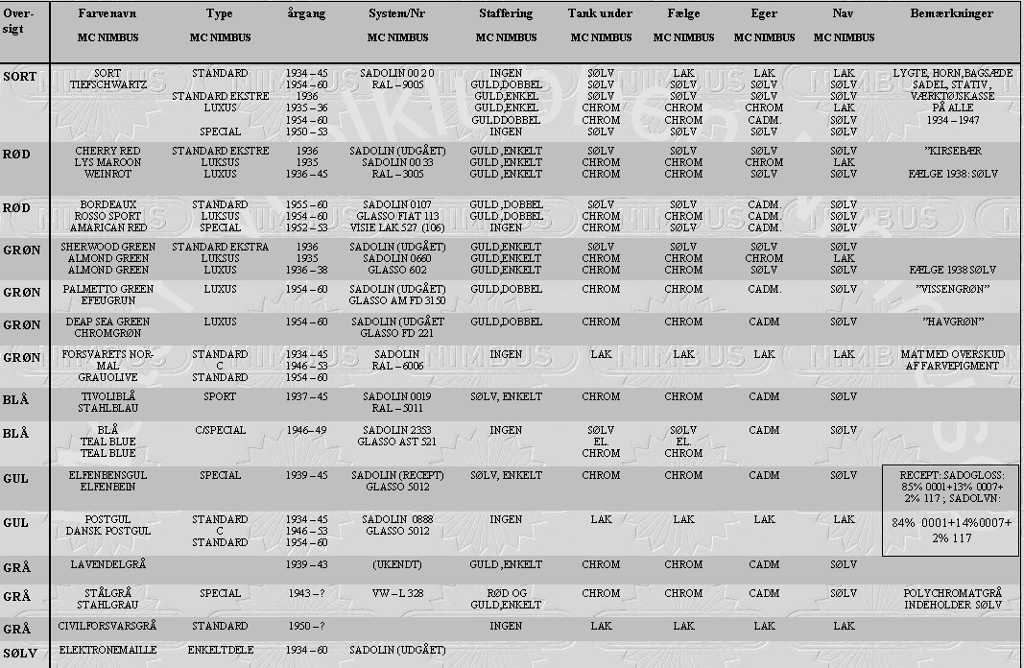
Based on the frame number and the original factory records, my Nimbus is a 'Special' and from the chart covering 1950 would have had a 'sort' (black) frame, with 'ingen' (no) 'staffering' (pinstriping). The underside of the tank would have been 'solv' (silver). The 'fælge' (rims), 'eger' (spokes) and 'nav' (hubs) were all 'solv' (silver) and that matched how it looks today. Obviously here and there it has been repainted and touched up, but it does appear that the bike is still using the same colour scheme as it originally had.