Carried Away

I admit that very occasionally I do get carried away – or at least perhaps allow ambition to get in the way of common sense. In 2015 I picked up a couple more 1972 model GT750’s and suddenly found I had no room to put them anywhere. Some decisions needed to be made.

Just to recap – back in 2009 I found this tired old soldier and brought it home (just ‘click’ on any image for a larger version):

And then in 2014 I was offered its assembly line mate, having the next consecutive frame number seen below to the left. That seemed so incredible (I mean, really what are the odds of that happening) that I decided to restore the both of them. Admittedly, it was not going to be easy as both were in very rough shape, but they did both still have their original engines. Below and to the right is a photo of them re-united after so many years:


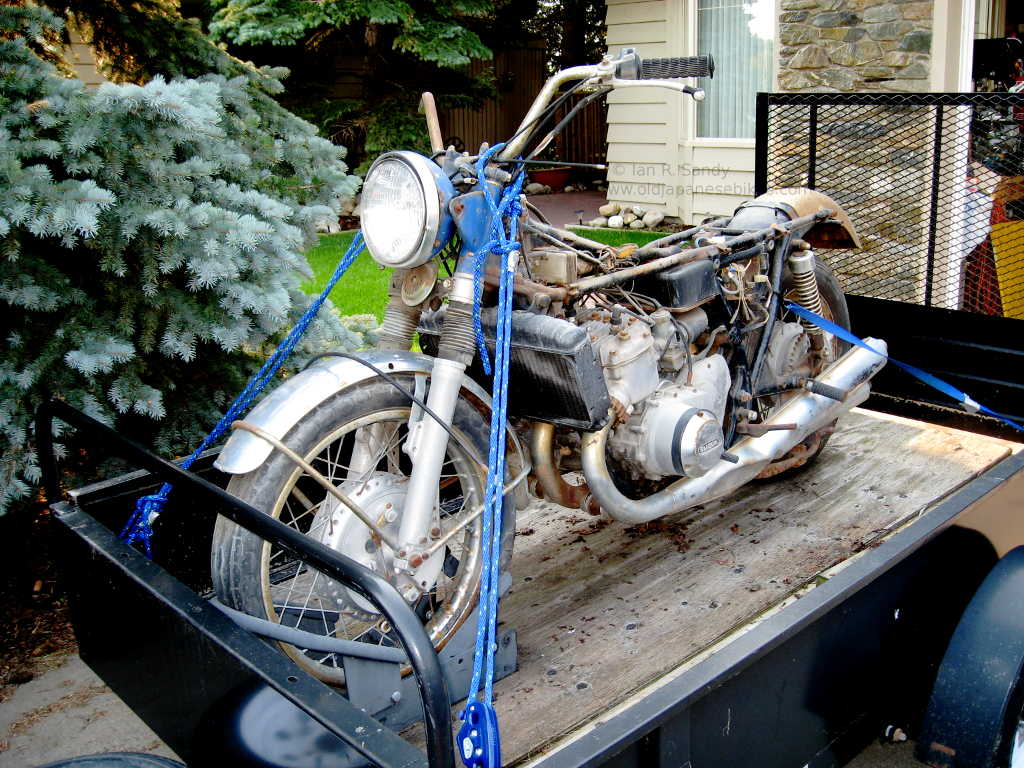
Then, in rapid succession in 2014 and 2015 came three more – all of them basically scrap. And truthfully, one was just a frame:


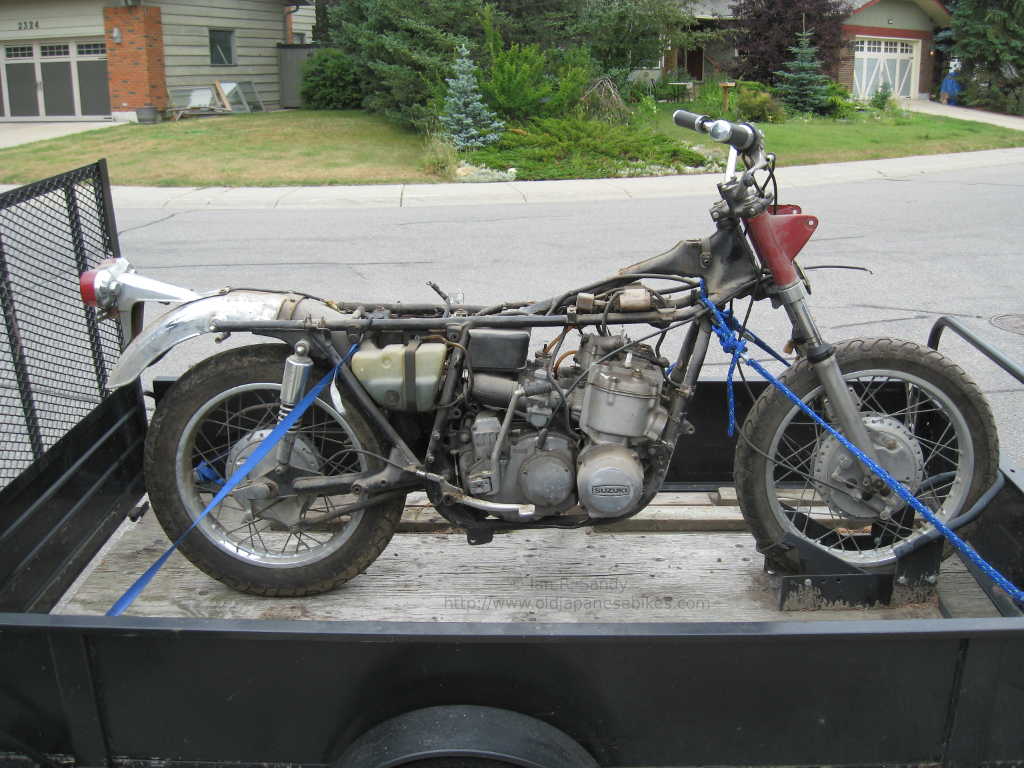
I also had several spare engines, so clearly some triage was needed.

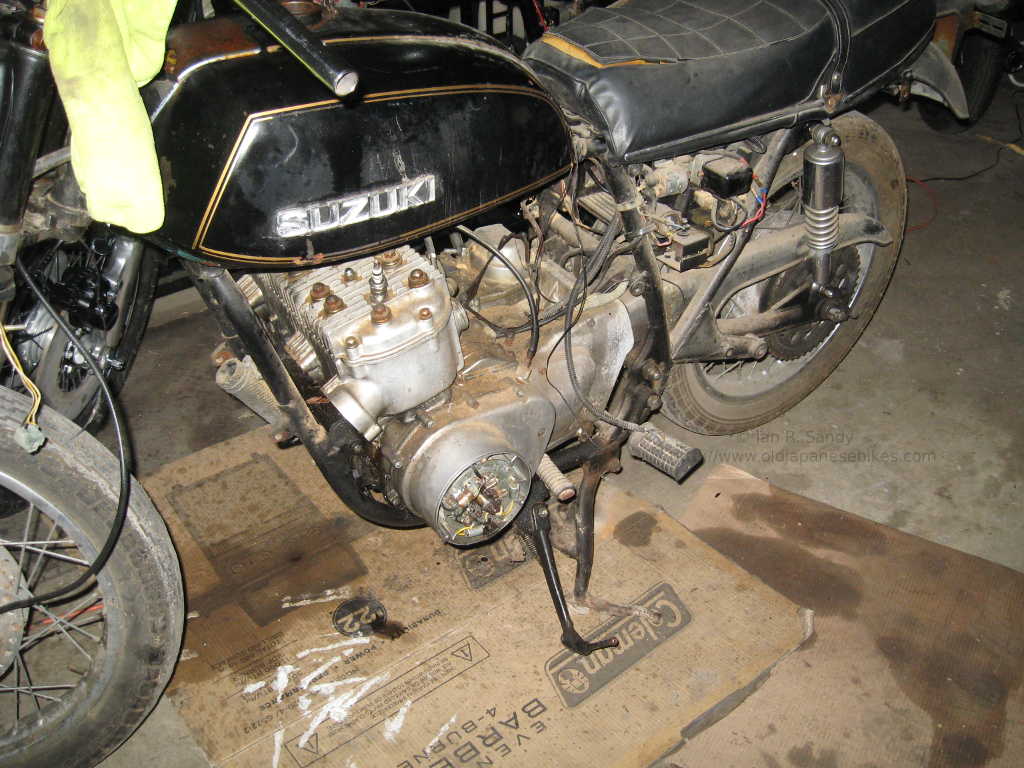
Restoring the two consecutively numbered frames with the original  engines was a given, but I seemed to have enough ‘bits’ for at least a third build if I wanted to attempt it. Suzuki iterated the frame design over the course of production, and so to establish a ‘theme’ I decided to opt for only the original style frame type, which actually is also the worst design.  That eliminated one frame from the list. Likewise a significant change was made to the engine design at about frame number 21133 which eliminated a couple of the engines I had. Another frame had some damage which would be difficult to repair, which left me with the bare frame as being the best candidate. All I needed was a suitable engine case having a number that was close enough to be ‘correct’ and I’d be in business. Luckily a search through the heap of old cases in Fred’s garden shed turned up one that, once the mouse droppings and dirt were cleaned off it, looked to be in good enough condition to use.

I had initially decided to build a bike in each colour offered in 1972 by Suzuki in Canada being: Yellow Ochre (gold), Candy Jackal Blue and Candy Lavender (famously referred to locally as ‘man-genta’). The trouble was, there were already a lot of fully restored or excellent original gold and lavender GT750’s out there. Looking further afield in Japan, the model was offered in a Bright Flake Red which I think looks really nice, and I liked the Candy Blue so, for the moment at least, the plan going forward is to do up the consecutive framed bikes in red and blue. That left a decision to be made about a third build.

Everyone does full up restorations – it has turned into a bit of a competition really – and the sad fact is after spending all that money, effort and time many of these restored machines become ‘trailer queens’ and do not get used as they were intended. A writer whom I enjoy reading by the name of Rick Parkington, is a big advocate of ‘oily rag’ restorations – basically just do what you need to do to make the thing mechanically sound and running properly, and live with the dents and rust which really are the history of the life of that machine. So, really a ‘recommissioning’ rather than an actual ‘restoration’. While this is common with older British and American bikes, you don’t see too many Japanese ones. As I had access to a lavender set of tin still in original paint, and as there is at least one other purple one in lovely original condition here in Calgary already, I decided to make my third built a purple oily rag rebuild. It helped that I personally don’t really like purple bikes (sorry Wade !).

And before someone sends me an email, I realise this won’t technically  be a ‘real’ oily rag recommissiong as I will be building it up out of bits, and as I have no way of knowing what colour tin was originally hung on the frame I’m using. I can live with that. I suspect that with a bit of luck, there is a good chance it will offend a few of the self-appointed judges of all things ‘correct’ out there, which will perhaps put a smile on my face !  Plus it won’t bother me if I scratch the paint. 🙂

Posted in Motorcycle | Tagged , , , , , , , , | 1 Comment

More Low Clouds – Part Three

So the day had come – after all this work not to mention a chunk of loose change, had these engine modifications actually improved anything ? Well, for one thing you will note there was a lot less smoke this time (see the original post here) !

After running in the engine and putting a few hundred miles on it, I took it back to RPM Services south of Calgary for another dyno day. As well, I took along a second exhaust system made by Gibson Exhausts in the UK. I bought these a few years ago when living in Europe as I just liked the look of them, but I also always wondered whether they actually did anything to improve the performance other then weighing a fraction of the stock exhaust system.

After several runs, the results were in – the chart below shows three curves – the lowest one is the result from the bench mark run before the engine rebuild. The middle line shows the result from the rebuilt engine fitted with a stock exhaust system and also with stock BS40 carburettors and airbox. The carburettor jetting is also factory stock, which for our altitude here in Calgary means the engine runs a bit rich which is OK as a starting point. I had forgotten to mention that I also had changed the points ignition to an electronic one made by Accent Electronics in Germany which I normally install as standard when I do rebuilds. The top curve shows the rebuilt engine fitted with the Gibson exhausts swapped in for the stock exhaust system, but with no other changes (so stock jetting on the BS40 carburettors, etc.).

You can click on the photo above to see a larger version, but to recap – the numbers are 55 HP at the wheel, dropping off to 53 HP in the original engine as it approached 7000 RPM. The rebuilt engine with the lift plate and clean-up (but no porting) and stock exhaust, BS40 carburettors with stock jetting, airbox etc., managed a clean performance increase right across the rev range topping out at just under 63 HP. That is an increase of roughly 15% which is respectable. The top curve shows that while slightly less than the stock exhaust below 4000 RPM, the Gibson’s come on pipe at about 4000 RPM and then peak at 70.2 HP at 7000 RPM, for a performance increase of roughly 27% over the base case, which is quite respectable.

So what’s next ? I have a couple of other exhaust systems I plan to test with this engine in its current iteration, and will eventually post the results here. At some point in the next year or two I’ll pull the engine and conservatively modify the porting, just widening the exhaust and intake ports, possibly dropping the exhaust port floor slightly but not much else. Then I will do the dyno runs again with the same sets of exhausts and see what changes.

And why bother doing any of this ? No reason really – having long winters allowing lots of shop time I suppose is a part of it, but truthfully ? It just makes me smile !

Posted in Motorcycle | Tagged , , , , , , , | Leave a comment

More Low Clouds – Part Two

The saga continues !

As offered previously, I needed to rebuild the engine on my blue 1976A GT750 but rather than just do a stock rebuild, I decided to try out a few common modifications in an effort to see what they actually contributed to performance increases.  Comparing performance increases is tricky – looking at the original period sales brochures shows these engines producing a claimed 70 HP, but they don’t say whether that is BHP or WHP, and that makes a big difference.  I’m not suggesting that manufacturers lie, but they do obfuscate. To make it even worse, both terms are often shortened to just ‘HP’ which doesn’t help at all. Add to this differences in readings from different dynamometers (dynos for short) and real life comparisons become tricky.

BHP is ‘brake horse power’ and is measured at the flywheel of the engine and will always be much higher than a measurement taken at the drive wheel due to losses in the transmission and drive train. A dynamometer will measure power at the drive wheel – WHP, and is typically around 13% to 18% less than BHP.   Using 18% as a worst case number, this would indicate that 70 BHP would be around 58 WHP, which actually matches several measured test results I’ve seen. Recall in my original test (see this link) , the reading I got was 55 HP measured at the wheel.

So I added a lift plate (just click on any image for a larger version)  and had the top of the barrels milled by the amount of rise. I also had the head milled to raise the compression and used a thinner head gasket having a 72 mm fire ring. If you measure the stock Suzuki head gaskets, the head gasket fire ring is a 73 mm diameter – that is fine if you are at maximum oversize on the cylinder bores, but wastes available compression otherwise. I ended up with 150 PSI across all three cylinders once the engine was assembled.

I blanked off the SRIS ports, and as mentioned before did not change the porting, but did spend some time cleaning up rough spots and misalignments in the passageways. For example, with the barrels fitted to the upper crankcase half, I made sure that any edges were smoothed so that they matched.

At the same time, I also matched the inlet boot inside diameter to the block inlet as the factory casting has a large step. You can see the size of the step and the amount of metal to be removed in the photo to the right.

I also decided to use the aluminium water pump gear in place of the stock nylon one – only because I happened to have one as I’m not actually convinced it will make any real difference to performance. It does look nice though !


I did use Suzuki pistons, seals, rods and bearings for the crankshaft rather than after market products. The lift plate was supplied by Cometic Gaskets in the USA along with the special order head gaskets. The machining and crankshaft rebuild was done for me by Joe at RPM Services just south of Calgary.

And on to Part 3 !


Posted in Motorcycle | Tagged , , , , , , | Leave a comment

More Low Clouds

Very nearly two years ago I started a project to rebuild the engine of my 1976A test mule by doing some dyno testing. This was to establish a baseline of how the engine was performing before actually making any changes – I wrote about it here.  The work kept being put to one side as life got in the way, but eventually the job was done and this morning I re-ran the dyno testing on the fresh engine and we have a result ! First though, a bit of a refresh.

This bike is a basically a test rig, and over the years I have hung various bits and pieces on it – it was for a while a very convenient place to store good spares for my other 1976A, it has had a couple of different engines installed for testing, as well as several carburettor banks, again for testing. This time I wanted to try something different, and after some discussion with a friend of mine in the USA decided to do a two-step tuning process:

  • Step one would involve seeing what difference a lift plate by itself made to the engine performance
  • I wanted to then see what difference various exhaust systems actually made on the new fresh engine

Important note: I am not any sort of tuning expert. There are many people out there who will gladly step forward and make that claim – I do not.  Secondly, the few people I do consider to be ‘expert’ also are trying to make a living preparing racing machines, and so do not generally share what it is exactly they do to an engine to make it perform ! As a result getting any genuinely useful information is not easy. For this reason, whatever level of performance I have been able to achieve I know can probably be much improved – all it really takes it money.

The Suzuki GT750 engine can be made to produce in excess of 100 HP, but that level is not really suitable or safe for a road bike of this vintage still using a stock frame. For usability, a target of 70 to 80 HP is commonly seen.  I am not going to go into the theory behind the ‘how’ part – there are lots of books out there that describe this, but to get that sort of power with a 2 stroke engine normally means having to do two things: change the porting to make the engine breath better, and then use a tuned exhaust pipe to hold the fuel charge in the cylinder long enough for it to generate power when combusted.

One of the problems with the GT750 engine is that to open up the exhaust ports risks cutting through into the cooling water jackets on the later cylinder blocks. For this reason a ‘lift plate’ is commonly inserted under the block to raise it and the ports up, and then the amount of rise is milled off the top of the block.  I used a 2.5mm lift plate and after adding in the gasket thickness  had a bit over 3mm milled off the top of the block, such that the piston outside edge was even with the top of the block when at TDC.

Note: I did not do any actual changes to the size or shape of the ports themselves, as at this point what I wanted was to determine what if any change was attributable to just using the lift plate. I did clean up the castings, smooth out rough spots and open up the intakes to match the inlet rubbers.

This is a photo of the lift plate fitted in position with the two gaskets (just click for a larger image):

I’ll continue this in Part 2 !

Posted in Motorcycle | Tagged , , , , , , , | Leave a comment

Having a Danish

To quote a character from the brilliant television show Monty Python, “and now for something completely different”.  I’ve gone and bought a 1950 Nimbus. What’s a Nimbus you say ? Well – it is a Danish 750cc, four-cylinder, over head cam, exposed valve spring, shaft drive, 3 speed motorcycle, with an archaic flat steel strip and riveted frame. I sometimes think of it as a sort of  ‘James Watt meets Soichiro Honda’ collaborative effort, but to me it is much more than that as it oozes character and is most definitely unusual ! Below is a photo of how it looked when I first got it. (click on the image for a larger version).

Why did I buy this ? I have been asked that many times actually, and my flippant answer is that I bought it because I couldn’t afford a Henderson, Ace or an Indian 4 (just Google them if you don’t recognise the names), but of course that isn’t why at all. It comes down to perhaps three things I suppose:

  • I was interested in having something in the stable older than myself.
  • I wanted something different and out of the norm, but still somewhat usable in today’s world and with reasonable support for parts and service.
  • I also wanted something metric, and with the gear shift on the left side as God intended.

In Canada, the Nimbus is quite rare – I can only confirm the existence of five others, although I suspect there must be a few more. Originally there were roughly 12,000 in total of this model built (it is a model ‘C’) between 1934 and 1960 by the Danish company ‘Fisker and Neilsen’. It is estimated that there are still in excess of 4000 of these machines in active use, mainly in Denmark, but also quite a few scattered about elsewhere in the world.

Parts availability from Denmark is quite good and there is a very strong and loyal owner community supporting them. And these bikes are tough – designed for hard daily usage, and used by the Danish Post Office, Military and Police in some cases through to 1975. In 2009, a pair of Norwegians rode two 1937 Nimbus machines around the globe, travelling a distance of roughly 70,000 km (see ‘The Dumb Way Round” web site at this link). While the trip was not without mishap or adventure, it certainly proved that in addition to the riders, these bikes were pretty rugged.

Getting back to this Nimbus – an older gentleman here in Alberta imported this machine from Denmark in 2001 and I had been discussing the possibility of buying it from him for very nearly the past 5 years. We finally reached agreement on a deal a few weeks ago. The bike is mostly original and in generally good shape. I do not intend to restore it – just conserve it doing only what needs to be done to keep it safe, healthy and road worthy. As with my other bikes, I will eventually post additional material on my web site located at this link.

It is often said with old machines such as this, that you don’t really own them – you just look after them till eventually handing them over to the next keeper, and I believe that completely. But you do get to keep the smiles !


Posted in Motorcycle | Tagged , | Leave a comment

Short a Few Segments

A common problem on the Suzuki GT750 is the eventual failure of the digital gear position indicator. I would be the first to admit that I thought it was a bit of a gimmick when I first saw one, but after a few days I found I really liked having it so when it starts to fail it is more than a little annoying !

The failure symptom usually is a loss of one (or all) of the indicator segments on the LED light (just click on the image for a larger version) . These are a Toshiba unit, and each combination of segments making up a number is activated by a switch mounted on the shifter drum. As you change up or down through the gears, the shifter drum rotates and the corresponding light segment is grounded out causing it to light. In the example above, you can see that one segment of the number ‘4’ has failed.

I have a few bikes with partially failed LED’s and just recently picked up a 1975 model on which the LED display only had one working segment and as well also had some creative wiring patches that needed to be corrected. The photo to the left shows one connector where the end has been re-moulded using epoxy resin. It isn’t clear in the photo, but the pins are all different lengths, and I had hoped that perhaps that was why the display LED was not working, but further testing showed that it really was scrap.

Replacement LED displays are readily available on internet auction sites for around $10 to $15 CAD each and also in different colours if you don’t care for the original ‘red’ colour. If buying some for yourself, you are looking for ones that have a fairly long set of leads as the end it needs to connect to is inside the headlamp shell below the instrument cluster.

Any of the replacements out of China are typically larger than the original display units so some fitting is required. I reused the original small metal bracket on which the old LED display was originally mounted, and used silicon adhesive to secure the new LED display housing in place on the modified bracket. There is a rubber shroud inside the instrument cluster housing (usually perished and falling to pieces after all these years) that I suppose was there to ensure you could see the original LED in daylight. This needs to be removed as the replacements are usually taller than the original. I mapped the colour codes for activating the different light segments by just supplying power (on this LED display the short red/white wire was power – you don’t seem to get wiring diagrams in the package you buy these, so a bit of initial guess-work may be required) and then just ground out each lead and made a note of the wire colour and what number it was. This unit came with the right size pins already crimped onto the leads to fit the correct connector for the Suzuki harness, otherwise you would need to crimp on new ones to suit.

When it was all back together it looked quite good ! There is some glare in the photo from the flash, so it actually looks a lot better than it does in the photo, and the larger numerals actually make it a bit easier to read in general.

I’m not sure these cheap LED’s will last as long as the originals, as 40 years seems a pretty good run for this sort of thing, but they are cheap enough and also simple enough to replace that I’m not too worried about it.  Now I just have to repair three more !

Posted in Motorcycle | Tagged , , , , | Leave a comment

Sammy Miller, NMM and Stafford April 2015

We are just back from a family vacation in Europe, which was in part timed to allow a visit to the 2015 April Stafford Motorcycle show in the UK. If you think you have been to a large motorcycle show before then think again – this one is huge !  I think that it, and others like it in the UK, is special in the sense that it puts on display an aspect of British culture that I haven’t seen in many places elsewhere in the world. It is far more than just some large swap meet/jumble/flea market or boot sale. Whether the result of having so many people crammed into such a small area (the entire United Kingdom is one-quarter the area of the Province of Ontario, but with five times the number of people) or as a result of the long exposure to crafts guilds and being the home of the industrial revolution and the evolution of piecework in a manufacturing context, there exists in the UK a tradition of independent craftsmen/women producing high quality speciality motorcycle parts and fittings in very small batches – often in a small shed at the back of their property !

This year there were about 900 vendors, and something like 30,000 people attending the two-day event, including Allan Millyard, the master craftsman and builder of many very unusual engines. The photo (just click to see a larger version) shows his latest creation, called the ‘Flying Millyard’ which is a 5000cc engine created using two cylinders from a radial aircraft engine. He actually had just finished riding it in a parade lap at the show – amazing !

Walking around the Stafford show soaking in the sounds and sights was a treat, and something I would recommend to anyone.

While in the area we visited the National Motorcycle Museum located just south of the city of Birmingham. The NMM  has an amazing collection of British machines, dating from the late 1800’s, but was also a bit frustrating as they were not arranged in any obvious order, grouping or theme and often were also not very well labelled or in some cases not labelled at all. They did have a couple of bikes I was especially interested in: a fully restored example of a 1946 Norton 18 similar to what my Dad used as a side car tug to haul my Mum and I around England before we moved to Canada , and a beautifully restored 1926 BSA Model B similar to what my Grandfather had when he first met my Grandmother.

Note that unlike other museums, the NMM doesn’t have machines from other countries (it is called the ‘National’ museum for a reason !) which does make for a few gaps in the time line as the UK motorcycle industry imploded and had largely ceased to exist by the early 1980’s. However that is of course changing and now new UK machines are being added to the collection of about 600 beautifully restored machines on display, with another 200 odd still to be repaired following the catastrophic fire they had in 2003. It is well worth a visit.

As we had a bit of spare time, we also drove down to the south coast of England and visited the Sammy Miller Museum near the small town of New Milton. The NMM could well learn a few things on how motorcycles should be displayed if they also were to visit, as the Sammy Miller Museum is one of the best I’ve been to. In addition to the machines themselves, the place is packed with related memorabilia and period articles that provide context to go with the displays. Best of all, the machines themselves, much like the ones at the Barber Museum in the USA, actually work and can be ridden.

As may be expected, one that I found especially interesting is what is claimed to be the only working Scott 1000cc two-stroke, water-cooled triple. It is a stunning machine and a pity it never went into full production, but then it is only one of many stunning machines in display. If you enjoy seeing a selection of really interesting two-wheeled machinery, then the Sammy Miller Museum needs to be on your list. Recommended !

We had a great time away, but I have to admit that am I looking forward to spending some time in my own shop and getting the current project (a 1977 GT750 Suzuki) out the door. All it needs is a bit of paint so my hope is that Guy at Cyclemania Artworks in Okotoks  has been busy with it while we’ve been away………………..


Posted in Family, Motorcycle, Travel | Tagged , , | Leave a comment

Dating a Suzuki

One of the things that I know we all lay awake at night thinking about is ‘what do those markings on Suzuki components mean ?’.  So to put our collective minds at ease, I have been doing some checking into how Suzuki marked dates of manufacture on things they made.

John Brookes in the UK operates a Kawasaki Z2 site and first wrote about this topic and he has been kind enough to let me reference some of his material as a starting point for dating Suzuki components. While this information may only be of interest to ‘rivet counters’ or (to use the UK term) ‘anoraks’, with each restoration or even each needed repair, the original factory markings often disappear. This then leaves us with fewer and fewer benchmark examples of what the machines actually looked like, which parts actually were installed and also, what it is you actually are buying when paying top dollar/pound/euro or yen for a supposedly ‘original’ machine.

To quote John:  “Anyone who has looked closely at Japanese motorcycles from the Seventies may have noticed various numbers/letters stamped or marked on some of its components. In some cases, these are date codes and it should be pointed out that these date codes relate to the date of manufacture of the part and not the motorcycle. In general it is normal to see a date of between 0 to 2 months before the manufacture date of the bike.

Before reading further, it is necessary to understand a little bit about Japanese dating practices. Since 1868, when Japan switched rulers from a Shogun to an Emperor, there have been four reigning Emperors: Meiji, Taisho, Hirohito (Showa), and Akihito (Heisei). Japan’s traditional era is based on the emperor’s reign and machines manufactured during the seventies were manufactured during the Showa reign. Hirohito (Showa) came to reign in 1926 and therefore a Gregorian date of 1973 would be the 48th year of Showa.”

For the Suzuki years under discussion, you then have the following Showa equivalents: 43=1968, 44=1969, 45=1970, 46=1971, 47=1972, 48=1973, 49=1974, 50=1975, 51=1976 and 52=1977.  To further complicate matters, Japanese parts can be dated by either the Showa code or Gregorian code, and abbreviations are sometimes used as well (‘3′ rather than ’73’ to signify Gregorian 1973 for example, and ‘8’ for Showa ’48’ being Gregorian 1973). On top of all this, and to totally confuse things Suzuki went one step further and also marked parts with the actual part numbers, and then wheel rims had a different marking system completely which I’ll get to in a moment.

Most of the material I have is specific to the GT750, but from what I’ve seen it applies to other Suzuki models also.  What follow are a few examples – just click on any photo to see a larger version.

I have gone through my gauges for the T500, GT550 and GT750 and so far have found only one instrument that has a date stamp. Referencing the photo to the right, this gauge is off a brown face, KPH 1977 GT750 and the Showa date clearly shows this as a June 8th, 1976 date of manufacture. The others I have often have what appear to be quality control or inspection stamps, but no dates. If anyone else has additional examples I’d appreciate you contacting me.

Carburettors were punch stamped, and then ink stamped after 1974 (depending on the model) and used the part number  as well as an indicator to mark left, centre or right as applicable.  This is a GT750 carburettor from a 1977 ‘B’ and is clearly marked with a 316, which is the model number for the M, A and B GT750’s and the suffix of ’23’ which is specific to the ‘B’. The ‘R’ indicates it is the right side carburettor. Fuel cocks used a similar methodology.

Takasago supplied wheel rims to many Japanese bikes and had their own date stamping methodology prior to 1977. So when looking at a wheel rim marked as TAKASAGO 2.15 X18 6K 103 JAPAN. it decodes as: the manufacturer, the rim size (2.15×18). and then the date code of 6K which is 1976 and the month of November, followed by the model (103 fitting the GT500, GT750 and other Suzuki models).

For the full version of what I have found so far, please check my web site at this link.  So there you go – now we can all sleep at night !

Posted in Motorcycle | Tagged , , , , , , , , , | Leave a comment

A Field Guide to the Suzuki GT550

The latest addition to the OJB web site, called ‘A Field Guide to the Suzuki GT550‘ , is now on line along with a load of other new material. I am still validating a few things, but for the moment at least everything seems to be working.

Since first publishing the GT750 Field Guide some five years ago, I have regularly been asked which model of Suzuki I would do next. The truth is that if you don’t have access to a good sample set of machines to examine, then it is a really difficult task to put something like this together. GT550’s are not common here in Calgary and other than my own 1974 model which I sold a couple of years ago, I only know of one other that is still in original condition. For this project then, I enlisted the aid of owners in places like Japan, Germany, France, the UK and USA as well as a couple of folks locally here in Calgary. They know who they are and I thank them. The work is missing a few things – a few colour examples for example – and over the next while, as additional material surfaces or is made available to me, it will be added. As with the rest of the web site, it is a work in progress !

As always – any errors are my own, and I welcome corrections and additions.

Posted in Motorcycle | Tagged , , , , , | Leave a comment

Roy Sandy

Roy Sandy

October 12th, 1928 – November 27th, 2014

RIP Dad – you will be missed.

Posted in Personal | Tagged , , | Leave a comment